ALT_IMG

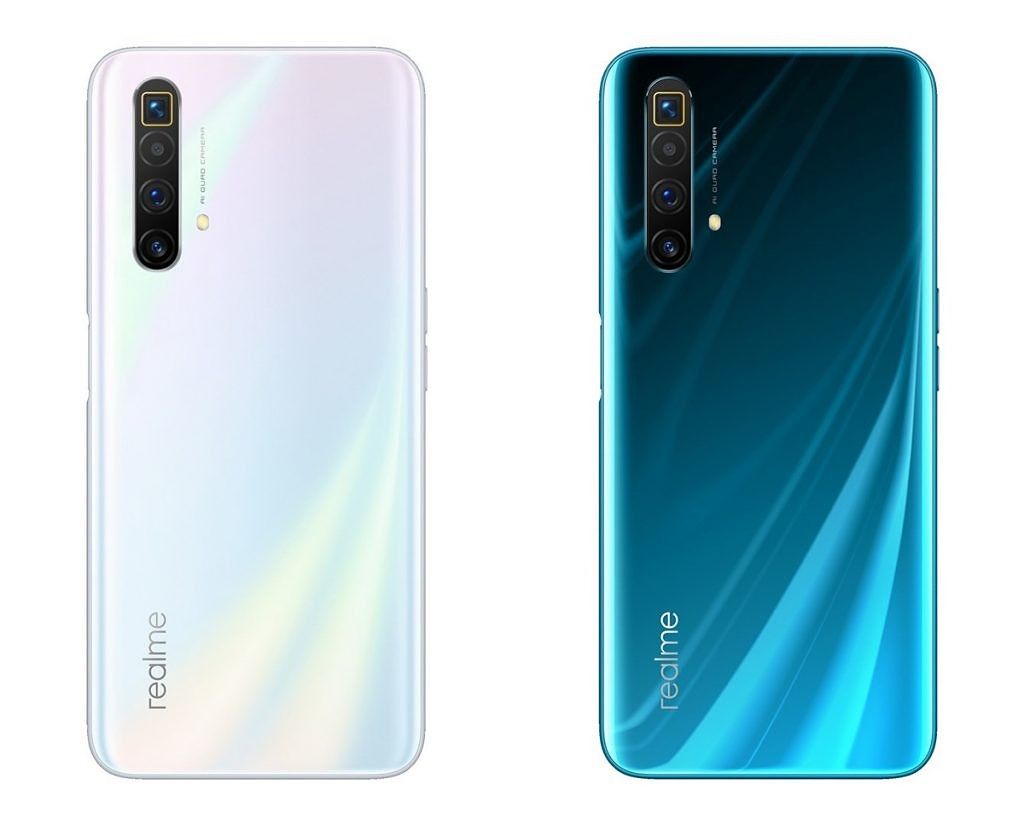
Realme X3 SuperZoom launches with the Snapdragon 855+ and 120Hz display

Design-wise, the Realme X3 SuperZoom looks quite similar to the X50 5G, which launched in China at the beginning of the year. It features a similar-looking 6.6-inch Full HD+ display with an LCD panel and a high 120Hz refresh rate. The display is protected under Gorilla Glass 5. Since this is an LCD and not an OLED panel, the X3 SuperZoom features a side-mounted fingerprint scanner – also seen on the X50 5G as well as the Realme 6 and 6 Pro. Readmore...

ALT_IMG

LG Optimus G Pro (Unlocked)

LG F240S Optimus G Pro 4G LTE is a new and updated version of Optimus G smartphone and comes with notable enhancements in display, size and processor. It features a huge 5.5-inch True Full HD IPS Plus LCD that essentially makes it a phablet. Readmore..

Alt img

Features Canon 650D and Nikon D5200 Which One is Best?

The beginner segment is always interesting to discuss, because the camera in this segment is still quite affordable but its already abundant and can be therefore people are no longer interested in buying a more expensive camera class. Readmore...

Alt img

Review OPPO Find 5

In 2013 was the triumph of mobile phones with a screen resolution of Full HD TV rival. OPPO Find 5 is one of them, 5 inch screen includes a resolution of 1920x1080 pixels. This makes the screen OPPO Find 5 has a density of 441ppi, alias the same as the Sony Xperia Z and HTC Butterfly. Readmore...

ALT_IMG

9 Smartphone with Most Durable Battery in the World

9 Smartphone with Most Durable Battery in the World. In addition to its features, things we should consider when choosing smartphones are the specifications, one of which is the battery life. Smartphone useless we have a sophisticated but battery endurance for a while, we will be annoyed at having to often to charge our smartphones. Readmore...

Showing posts with label Flashing Android. Show all posts
Tuesday, September 16, 2014

Hardbrick Solutions, Botloop, Softbrick, Fail Flash On Android

3 komentar


Hardbrick Solutions, Botloop, Softbrick, Fail Flash On Android - in some cases may often hear the term for the layman is still very foreign, but it is better understood that term with little hope of a solution to the current problems need not have to visit the repair service center.


Android Repair

The following terms and pegertian Hardbrick, Botloop, Softbrick, Flash Fail, Failure Recovery, Downloader Failure with corrective measures that should be done first, here the media using the JTAG repair:

Bootloop

Bootloop is a failed system boot occurs when the troubled, sometimes cause a media server that is not responding. Bootloop can be overcome by replacing the ROM, SD card Doing format, or also reflash back to stock.

SoftBrick

Soft brick is usually marked on the kernel splash hangnya HH (Hank logo). Softbrick can be overcome by mereflash reset to stock.

Hardbrick

Hardbrick known also failed boot bootloader which occurs due to the failure to detect the kernel, or the kernel driver that is not compatible with this hardware allows the kernel is not able to interact with the hardware.Hardbrick can be repaired with JTAG.

Fail flash

Failflash this happens sometimes after reflash stock that failed. Failflash has many forms are the most common PC logo that has an exclamation mark connected to HH. Can be fixed with a reflash stock ROM.

Failure Recovery

Failure Recovery trejadi bias HH hangs in recovery and not in the kernel splash. Can be fixed with reflash stock ROM.

Failure Downloader

Failure Downloader is failed boot failure recovery is almost similar but HH hangs in download mode (upgrade). Often repaired with JTAG.

Problems Hardbrick on android many factors that occur as a custom firmware - Flashing - Rooting - Install CWM - Modification / Oprek System - Change boot animation - Change Font - Chainfire tide and other factors may cause hardbrick on android.

Source from infogadgetbaru.com

Continue reading →
Thursday, September 4, 2014

Ways Flashing / Reinstall On All Android Devices

0 komentar
Ways Flashing / Reinstall On All Android DevicesMay have been many articles that discuss how to flash the Android ROM on the internet, but there may be some users that there are still many android also looking for articles that explain how to flashing with easy and simple, and therefore here I will try to share how easy it is and easy-hopefully this way I share quite understandable, especially aimed at the beginner android users. Before entering the flashing tutorial to better understand how you first know the definition and function of Flashing. Flashing is a technique in the process of re-install the operating system in android device which is useful to improve and update the software that is damaged / corupt, flashing is usually done on an android device that has experienced bootloop / restart repeatedly. Not only that, flashing can also upgrade or downgrade to the android operating system. Flashing is usually carried out for a variety of causes such as mobile phones are not normal anymore. Maybe also because android frequent errors, slow. average as most of the cases, which occurred android bootloop when turned on just until the logo alone, it is usually because it failed to install a custom rom, one modding, etc.. I share this tutorial is general, so you can apply to all versions of android smartphone Immediately following the tutorial How to Flashing / Reinstall On All Android devices: There are Some Requirements To flash the ROM Android include:

  1. Previous Android Smartphone you have already installed the application for data recovery such as Amon_RA, ClockworkMod (CWM), Potatoshare recovery, MIUI recovery, etc.. 
  2. Custom ROM / firmware that will be in the flashing should have qualified dimodif or made ​​specifically for your Android smartphone device like original stock ROM vendor default or custom ROM developer made (third party). 
  3. It has been installed microSD android smartphone, which serves as a temporary storage place on a custom ROM

ROM Flashing Method 
Once the above requirements are met, then you can follow the steps below flashing this ROM:

  • Prepare first custom ROM which will be flashing. This custom ROM file can be found on Google or various forums like xda developers, DJ, Facebook Group and android developers sites, search for the appropriate type of your cell phone. Usually, stock or custom file extension zip ROM. Or you also can create their own ROM with the various tools available on this link
  • After the file you have got a custom ROM, place the file on the SD Card, you simply plug the micro SD card on Android devices and make sure the micro SD Android devices unreadable by the system and do not forget to set and create a folder for the file storage. 
  • Then Disable the smartphone / android phone you then go into recovery mode. 
  • Still in recovery mode, after that you do a backup first ROM is mounted. It is very important to restore or restore data to its original state as if the flashing process fail later. 
  • Perform a data wipe / reset, wipe cache partition and wipe Dalvik cache. Thus the operating system on your Android device ROM has been erased completely. 
  • The next step is Flashing / install ROMs. Still in recovery mode, you select and install Zip from SD Card / looking flash zip from SD Card that have previously been saved to the folder you created earlier on the SD Card.
  • When finished do a flash confirmation by following the instructions on the screen (due to the touch screen function is not working at the time of recovery mode, then to move the cursor up and down you can press the volume up and down button and press the home button for yes option. 
  • Finish. please do restart by choosing reboot system now.
How easy is not flashing on android device? Hopefully you do not have problems in applying this simple tutorial. sorry if the tutorial above there are many shortcomings. A few article I share this time about the way Flashing / Re-Install At All Android devices, may be useful. Thank you for visiting.


Continue reading →